Enhancing the user account section of your WordPress website can significantly improve user engagement and data management. By integrating custom fields into user profiles, you can collect and display additional information tailored to your site’s needs. RegistrationMagic, a robust WordPress registration plugin, offers a straightforward method to achieve this. This guide will walk you through adding custom fields to the user account section using RegistrationMagic.
The user account section serves as a personalized area where registered users can view and manage their information. Unlike public user profiles, this section is accessible only to the individual user and administrators, ensuring privacy and security. By default, WordPress provides basic user information fields. However, to capture more specific data—such as phone numbers, addresses, or custom preferences—you can add custom fields using RegistrationMagic.
Adding Custom Field to User Account
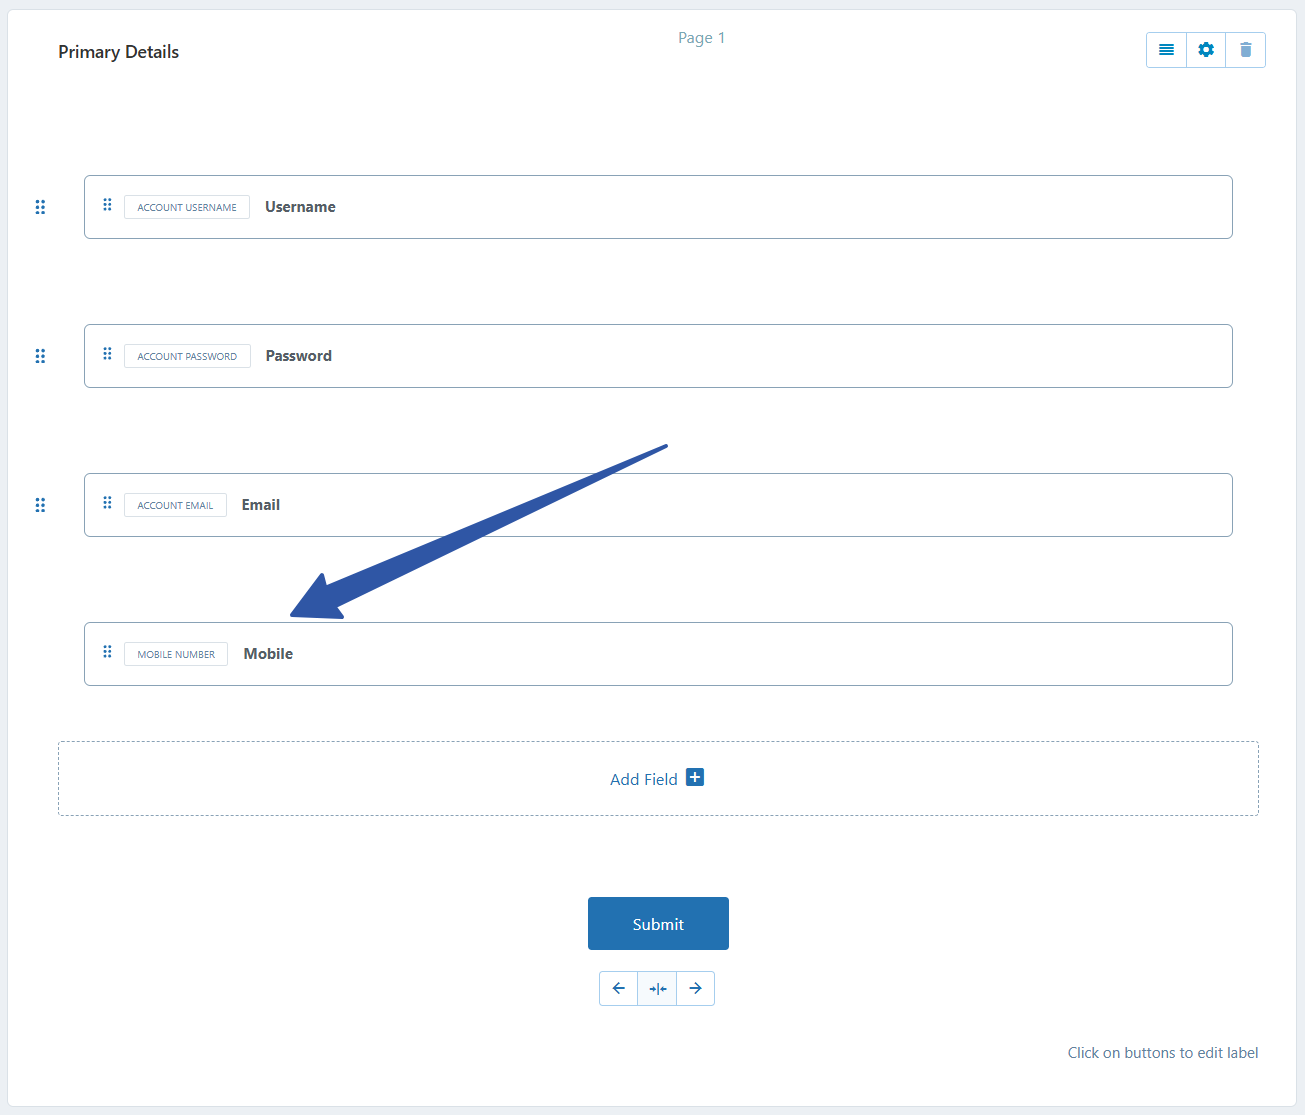
Now, to add a field to the user account, we need to first add that field to our form. We’ll be adding a “Mobile Number” field to our existing form. To know more on how to add a field to your form, check out our field addition guide.
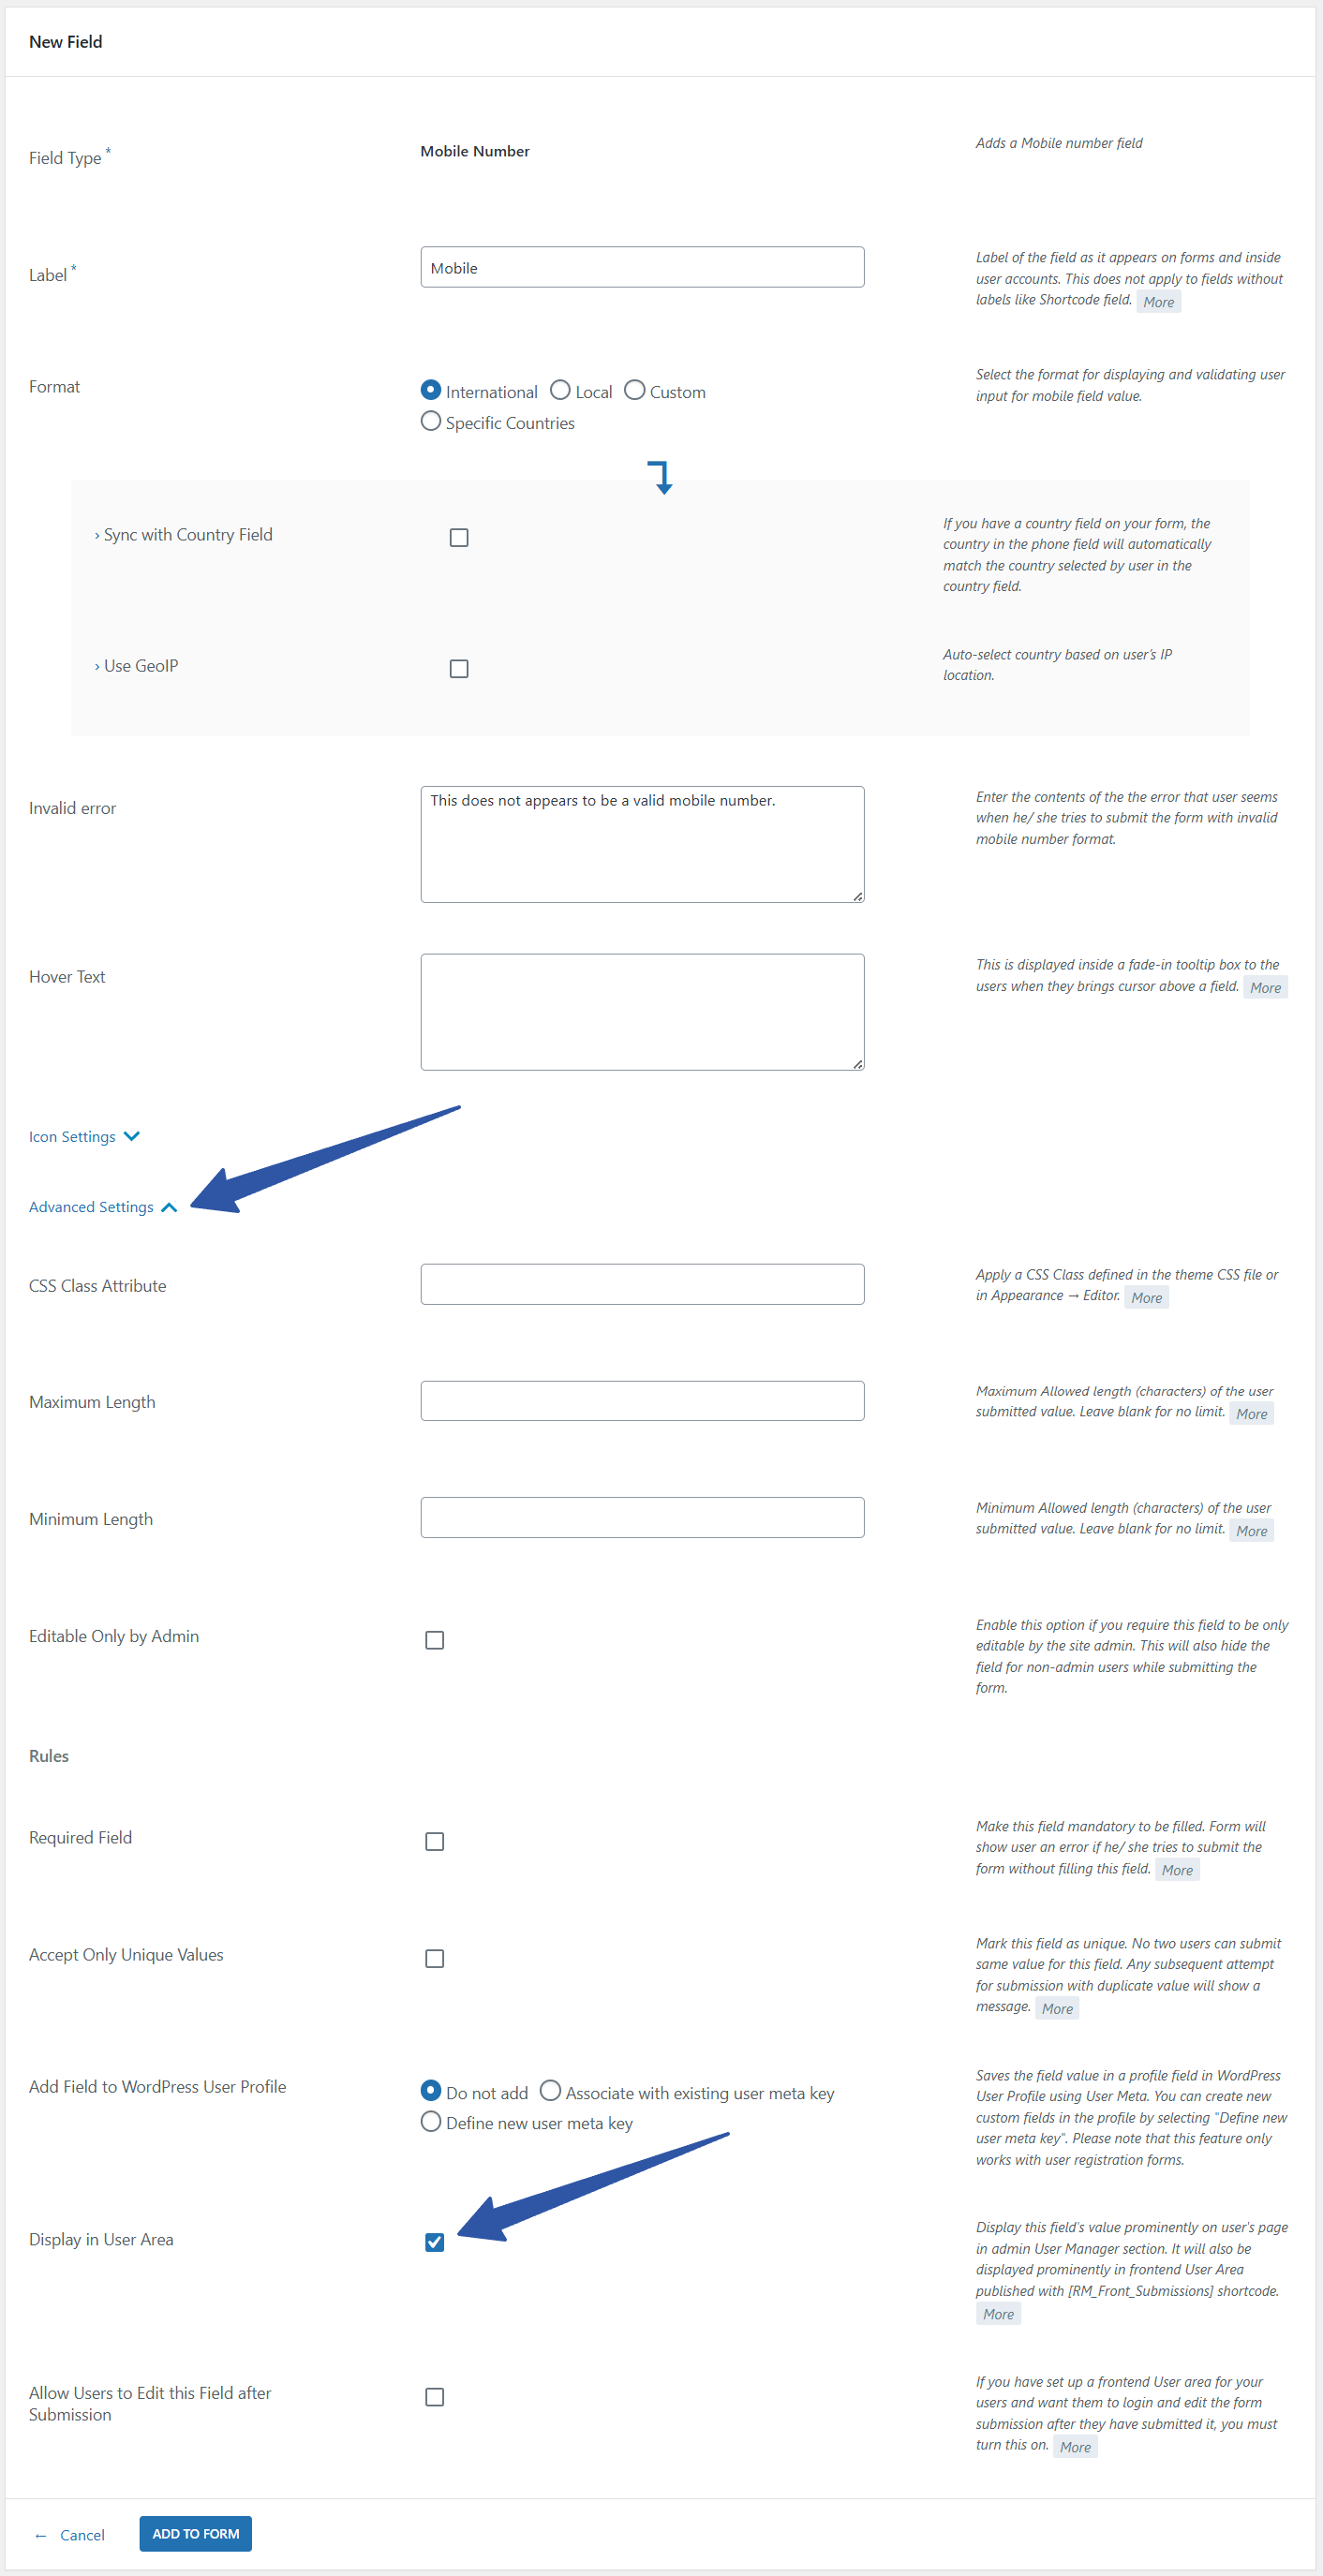
Then, edit the field settings and open the Advanced settings section. In this section, you will find the setting “Display in User Area“. Enable this and save the settings.
Now that we have added the field to our form, let’s check it out on the frontend and do a form submission. To know more on how to create and publish a form on the frontend, check out our plugin’s Starter Guide.
Custom Field Data on the User Account
With the form submission complete, RegistrationMagic has recorded the data user provided for the mobile number field. Since we have the “Display in User Area” setting enabled for the field, RegistrationMagic will display the provided data on the user’s profile. Let’s go ahead and see this on our profile right away.
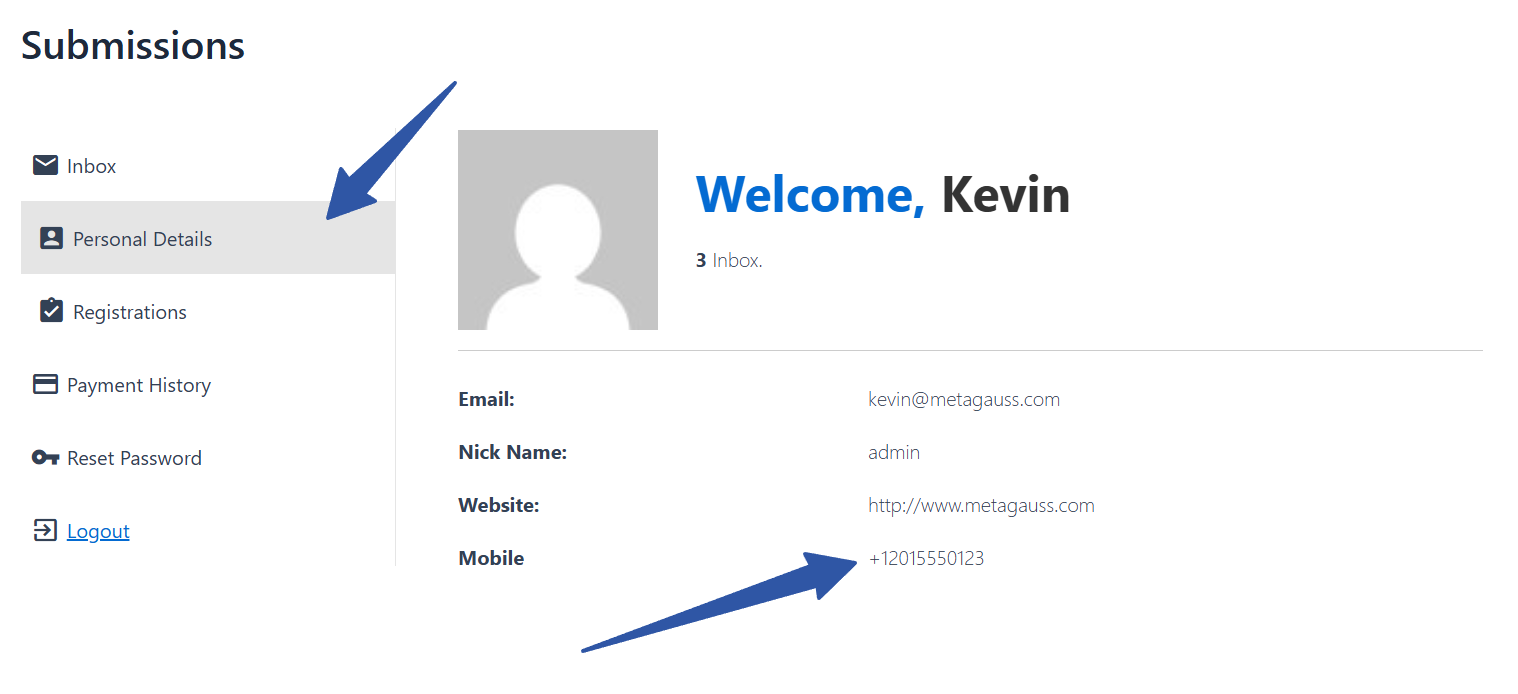
The field data will be visible in the Personal Details tab of the profile page.
Conclusion
Customizing the user account section with additional fields enhances the functionality and personalization of your WordPress site. By leveraging RegistrationMagic, you can efficiently collect, display, and manage user information, leading to a more tailored and engaging user experience. Always ensure that any customizations align with your website’s objectives and provide genuine value to your users.
- How to manage and export WordPress registration forms data? - March 24, 2026
- WordPress Registration Form Required Fields – Complete Guide - March 23, 2026
- WordPress Registration Shortcodes List - March 21, 2026
- WordPress User Registration Custom Status Guide - March 20, 2026
- WordPress Payment Form Guide: Setup Payments on Registration Form - March 19, 2026
- RegistrationMagic Starter Guide - July 21, 2025
- Best 5 WordPress Event Calendar plugins for 2026 - April 2, 2025
- Experience the Unfolding Magic! - August 4, 2023
- List of Guides for WordPress User Registration Process - July 28, 2023
- Frequently Asked Questions About WordPress User Registration Forms - July 28, 2023
What about if we want to use default wordpress my account section and want fields to appear there?
You will need to customize WordPress My Account page in order to achieve this.
This is also how I expected this plugin to work, I didn’t expect it to have a separate section for users.
This is achievable using RegistrationMagic and ProfileGrid integration. Steps to display RegistrationMagic fields on WordPress User Profile page:
1. Install ProfileGrid. Here is link: https://wordpress.org/plugins/profilegrid-user-profiles-groups-and-communities/
2. Create Group G. Make RegistrationMagic form F as default registration form of Group G via Group Settings.
3. Create fields in Group G. Map these fields with form F using map with option on ProfileGrid Edit Field page.
4. Submit form F in logout state as user U.
5. User U will be registered and become member of Group G.
6. All the mapped custom field values will display on WordPress User Profile Page.