Introduction
In this brief article, we will discuss the process of adding a new field to a WordPress registration form using the Fields Manager page of RegistrationMagic.
Adding a New Field to the Registration Form
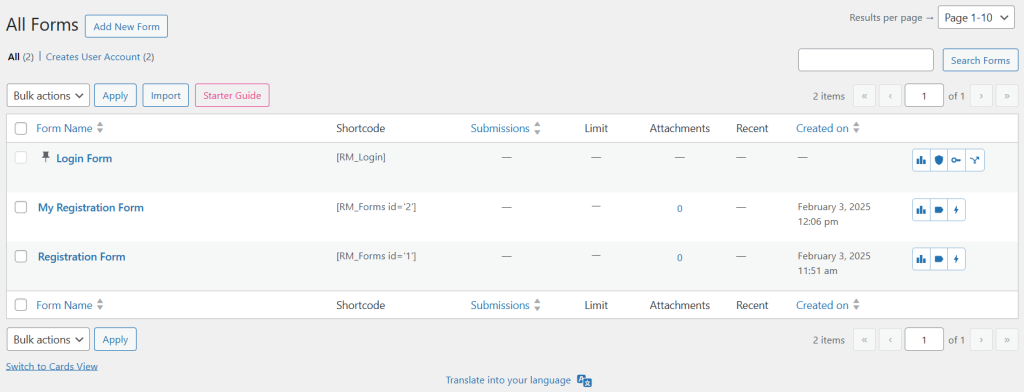
Once logged in, navigate to the All Forms menu of RegistrationMagic.
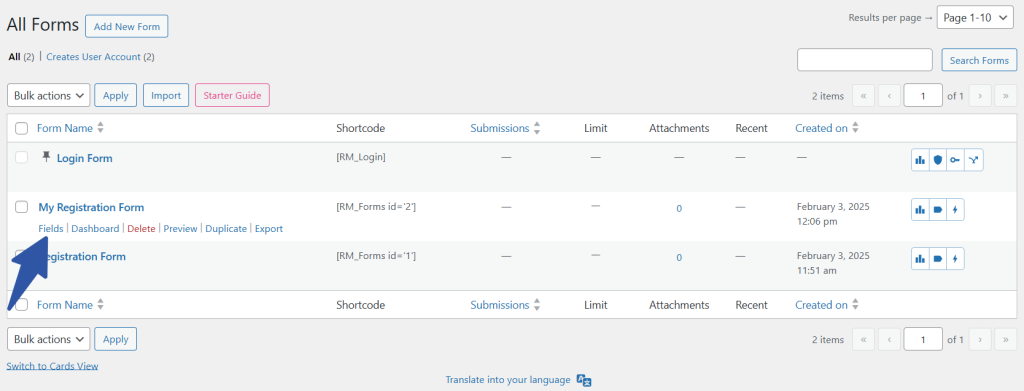
Hover your cursor on the form that you want to add the field to, and click on the Fields link from the contextual pop-up.
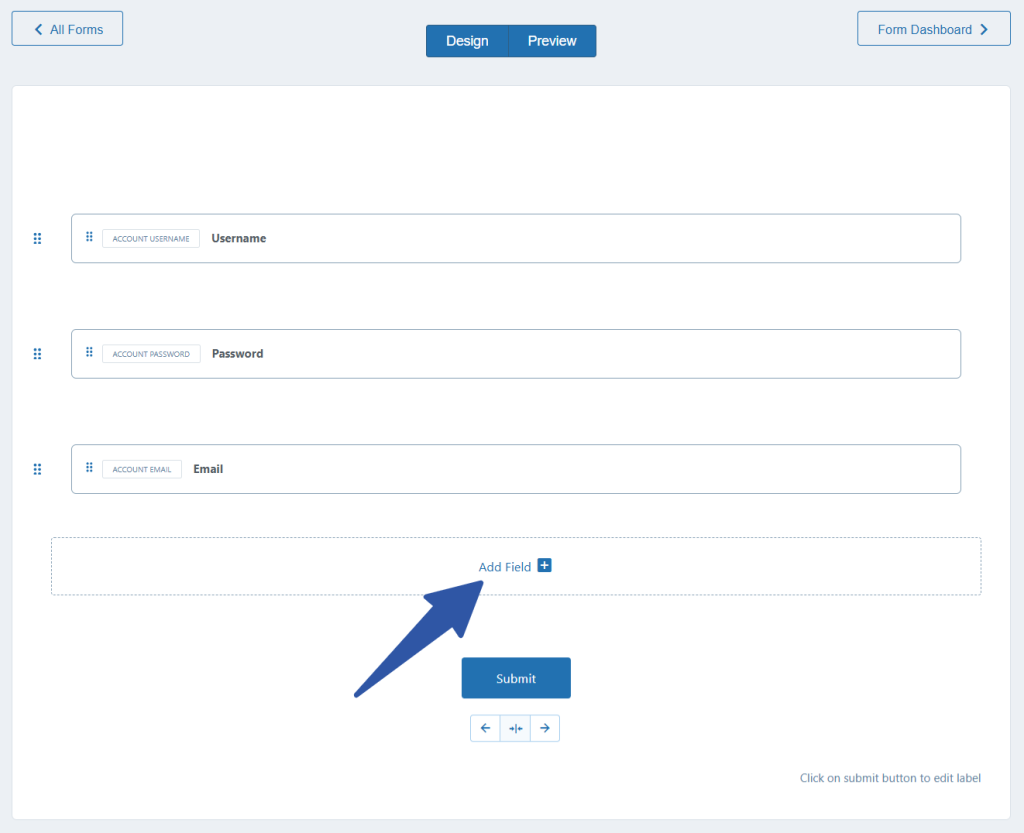
Clicking on it will land you on the Fields Manager page. Next, click on the Add Field button at the bottom of the existing fields.
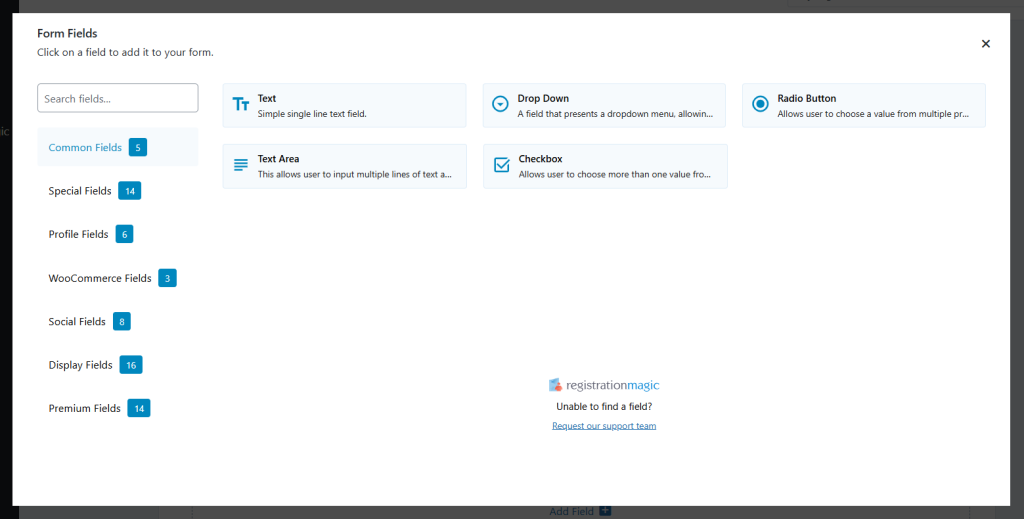
Clicking on the Add Field button will open a popup from where you can select the field to add to your form. There are many field types to choose from and you can search for a specific field as well.
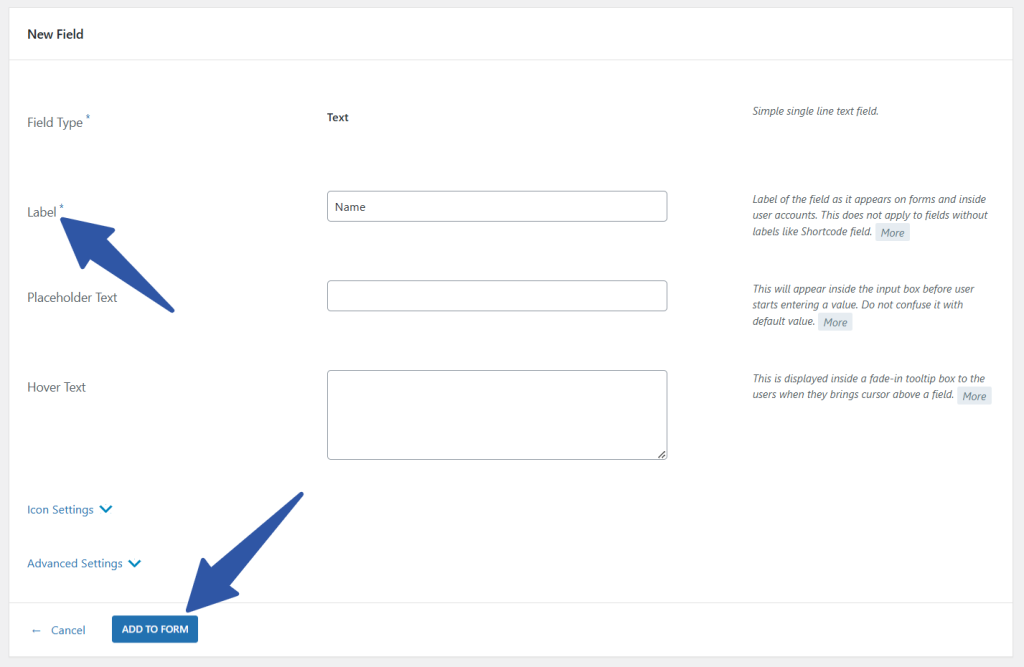
For illustration purposes, we will choose the Text field and fill in the required details for the chosen field. You may choose to edit the icon and advanced settings as per your requirements. Once you are done tweaking the field settings, click on the Add To Form button.
Note – It is necessary to enter the required details for the field type (marked with an asterisk). For example, a Label is a required detail for the Text field type.
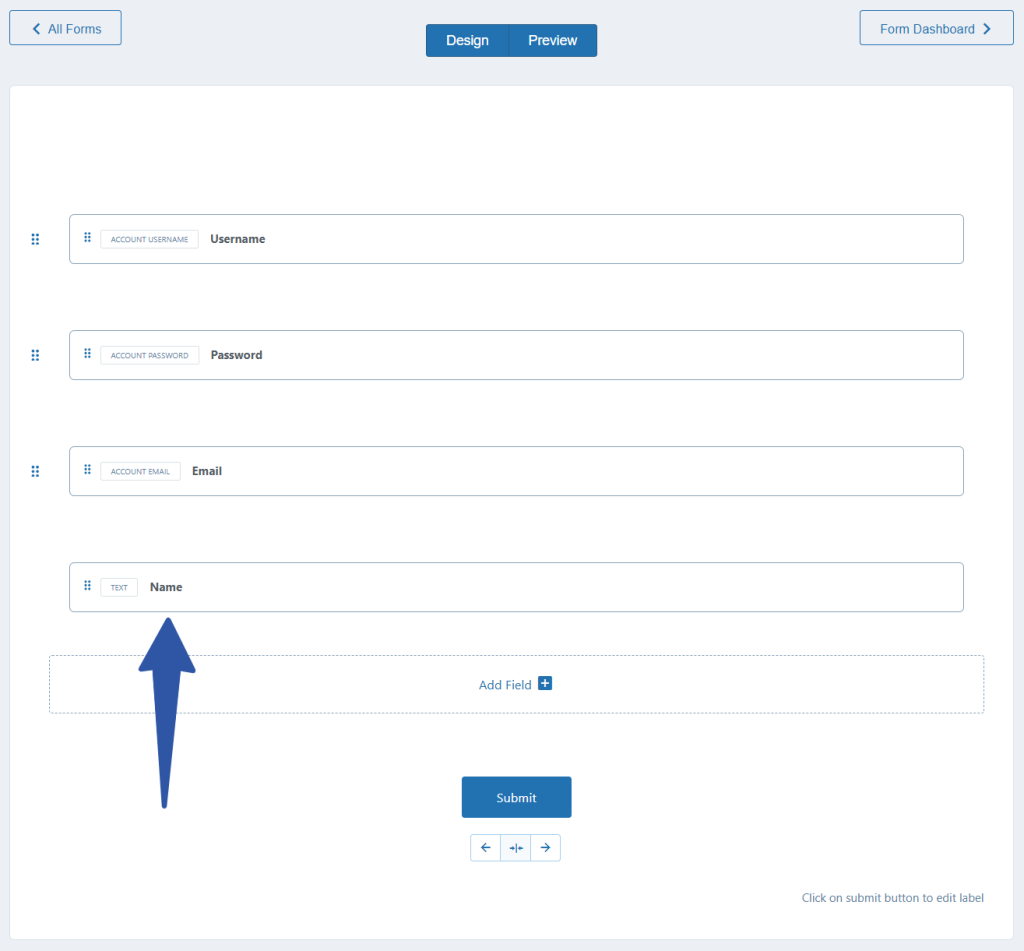
The new Text field is now added to the form.
The process of adding a new field to the WordPress registration form using RegistrationMagic’s Fields Manager is quite straightforward. It helps with the setup to create dynamic forms having different types of fields and settings.
- How to Access Login Form Options in WordPress? - July 21, 2025
- How to Add a New Field to a WordPress Registration Form - September 26, 2024
- How to Delete a Field from the WordPress Registration Form? - April 24, 2024
- How to Use Two-Column Layout in a WordPress Registration Form? - April 7, 2024
- How to Add a New Row to a WordPress Registration Form? - April 3, 2024
- How to Find and Copy WordPress Registration Form Shortcode? - March 28, 2024
- How to Quickly Filter Registration Forms that Create WordPress User Accounts? - March 13, 2024
- How to Access Registration Form Options from Form’s List? - March 12, 2024
- How to Quickly Preview Registration Form in WordPress? - March 11, 2024
- How to Sort Registration Forms in a WordPress Dashboard? - March 4, 2024